Linux Usage Guide
This guide is only relevant for you, if you chose the Professional Mode while creating an additional volume or if you want to adjust certain steps of the automatic provisioning process.
Prerequisites
This guide assumes that you already have a server and an additional volume in place and that you have root access to your server. All commands in this guide can be executed either via VNC console or via SSH.
You need to know the device name under which your volume is attached to your server.
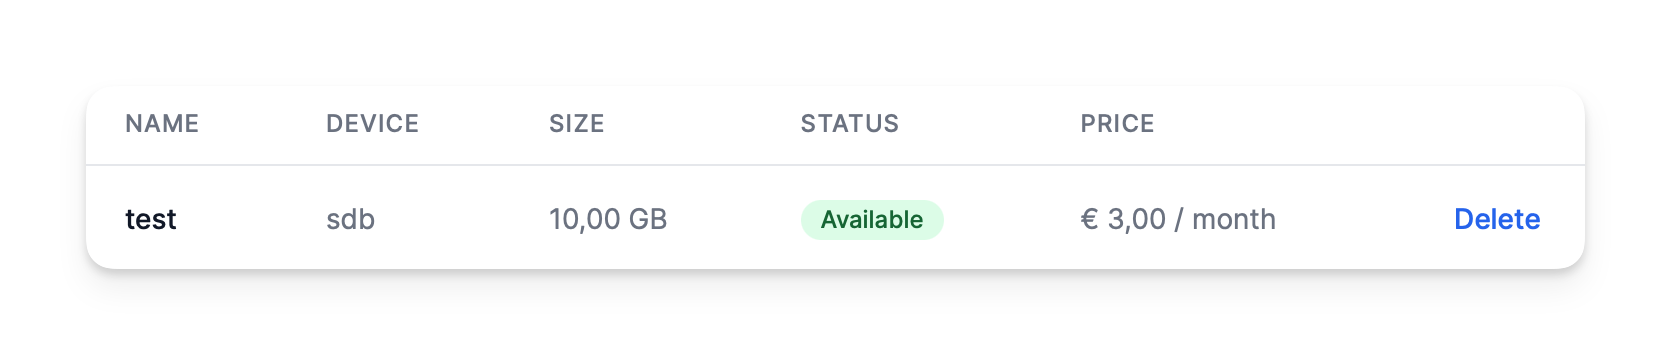 You can find this information in the Device column of your server's volume list.
Provisioning
The provisioning process consists of the following three steps:
- Partitioning
- Formatting
- Mounting
Please note that we try to give you as accurate as possible commands to follow along. However, there might be slight differences depending on your operating system version and the software packages you have installed. That's why we recommend you to use the automatic formatting mode if you are unfamiliar with the following steps as we can't provide extended support for them.
Partitioning
Verify attachment
First, you need to check and identify the attached volume.
lsblk
NAME   MAJ:MIN RM   SIZE RO TYPE MOUNTPOINTS
loop0    7:0    0  63.4M  1 loop /snap/core20/1950
loop1    7:1    0  63.4M  1 loop /snap/core20/1974
loop2    7:2    0 111.9M  1 loop /snap/lxd/24322
loop3    7:3    0  53.3M  1 loop /snap/snapd/19361
loop4    7:4    0  53.3M  1 loop /snap/snapd/19457
sda      8:0    0    50G  0 disk
└─sda1   8:1    0    50G  0 part /
sdb      8:16   0    10G  0 disk
Alternatively, you can use fdisk to list all available devices.
fdisk -l
[...]
Disk /dev/sda: 50 GiB, 53687091200 bytes, 104857600 sectors
Disk model: QEMU HARDDISK
Units: sectors of 1 * 512 = 512 bytes
Sector size (logical/physical): 512 bytes / 512 bytes
I/O size (minimum/optimal): 512 bytes / 512 bytes
Disklabel type: dos
Disk identifier: 0xe64aa8cc

Device     Boot Start       End   Sectors Size Id Type
/dev/sda1        2048 104857566 104855519  50G 83 Linux

Disk /dev/sdb: 10 GiB, 10737418240 bytes, 20971520 sectors
Disk model: QEMU HARDDISK
Units: sectors of 1 * 512 = 512 bytes
Sector size (logical/physical): 512 bytes / 512 bytes
I/O size (minimum/optimal): 512 bytes / 512 bytes
In the output of the command, you can see the /dev/sdb device that matches the device name sdb from the table on the additional disk page.
Create partition table and primary partition
Then, we need to create a partition table and a primary partition on the volume. This can be done using fdisk.
Please be very careful with the following commands as they can cause data loss if executed on the wrong device.
fdisk /dev/sdb
Welcome to fdisk (util-linux 2.37.2).
Changes will remain in memory only, until you decide to write them.
Be careful before using the write command.

Device does not contain a recognized partition table.
Created a new DOS disklabel with disk identifier 0x5b90a315.

Command (m for help):
To create a new partition table and a primary partition, press n + Enter followed by p + Enter.
Command (m for help): n
Partition type
   p   primary (0 primary, 0 extended, 4 free)
   e   extended (container for logical partitions)
Select (default p): p
You will then be asked to enter the partition number. Press 1 + Enter to create a primary partition.
Partition number (1-4, default 1): 1
The following dialog will ask for the first and last sector. You can just press Enter two times to use the default values, given the assumption that you want to use the whole volume for the partition.
First sector (2048-20971519, default 2048):
Last sector, +/-sectors or +/-size{K,M,G,T,P} (2048-20971519, default 20971519):

Created a new partition 1 of type 'Linux' and of size 10 GiB.
Finally the partition table needs to be written to the disk. Press w + Enter to write the changes to the disk.
Command (m for help): w
The partition table has been altered.
Calling ioctl() to re-read partition table.
Syncing disks.
The fdisk utility will be automatically closed after the changes have been written to the disk and you are thrown back to the shell.
Verify partitioning
Before proceeding with creating the file system, we need to verify that the partitioning was successful.
lsblk
NAME   MAJ:MIN RM   SIZE RO TYPE MOUNTPOINTS
loop0    7:0    0  63.4M  1 loop /snap/core20/1950
loop1    7:1    0  63.4M  1 loop /snap/core20/1974
loop2    7:2    0 111.9M  1 loop /snap/lxd/24322
loop3    7:3    0  53.3M  1 loop /snap/snapd/19361
loop4    7:4    0  53.3M  1 loop /snap/snapd/19457
sda      8:0    0    50G  0 disk
└─sda1   8:1    0    50G  0 part /
sdb      8:16   0    10G  0 disk
└─sdb1   8:17   0    10G  0 part
In the output you can now see that there's a new partition called /dev/sdb1 that is using the whole size of the block device.
Formatting
In order to save files on the additional volume, you need to format the partition, first. Unless you have specific requirements, we recommend using the ext4 file system as it is the most common file system for Linux.
mkfs.ext4 /dev/sdb1
mke2fs 1.46.5 (30-Dec-2021)
Discarding device blocks: done
Creating filesystem with 2621184 4k blocks and 655360 inodes
Filesystem UUID: db1974c2-20eb-4434-8428-c83212d5bc0c
Superblock backups stored on blocks:
	32768, 98304, 163840, 229376, 294912, 819200, 884736, 1605632

Allocating group tables: done
Writing inode tables: done
Creating journal (16384 blocks): done
Writing superblocks and filesystem accounting information: done
Mounting
Now that the partition is formatted, we can mount it to a directory in the file system. In this example, we will mount it to /mnt/additional-disk, but you could also mount it to, e.g. /var/lib/mysql if you want to run a MySQL database server and store the database on a separate volume.
mkdir -p /mnt/additional-disk && mount /dev/sdb1 /mnt/additional-disk
Verify
After mounting the volume, you can verify that it is mounted correctly by running:
df -h
Filesystem      Size  Used Avail Use% Mounted on
tmpfs           198M  1.1M  197M   1% /run
/dev/sda1        50G   17G   31G  35% /
tmpfs           988M     0  988M   0% /dev/shm
tmpfs           5.0M     0  5.0M   0% /run/lock
tmpfs           198M  4.0K  198M   1% /run/user/0
/dev/sdb1       9.8G   24K  9.3G   1% /mnt/additional-disk
Persisting
If you would now perform a restart of the server, the volume would be unmounted, and you would have to mount it again. To avoid this, we need to add an entry to the /etc/fstab file and persist the mount.
First of all, we need to find out the UUID of the volume. This can be done using the blkid command.
blkid
/dev/sda1: LABEL="root" UUID="41418efd-440e-4880-b23a-8d397745d901" BLOCK_SIZE="4096" TYPE="ext4" PARTUUID="e64aa8cc-01"
/dev/loop1: TYPE="squashfs"
/dev/loop4: TYPE="squashfs"
/dev/loop2: TYPE="squashfs"
/dev/loop0: TYPE="squashfs"
/dev/loop3: TYPE="squashfs"
/dev/sdb1: UUID="db1974c2-20eb-4434-8428-c83212d5bc0c" BLOCK_SIZE="4096" TYPE="ext4" PARTUUID="5b90a315-01"
Now, open the /etc/fstab file with an editor of your choice, e.g. nano:
nano /etc/fstab
Append the following line at the bottom of the file and save it.
/dev/disk/by-uuid/db1974c2-20eb-4434-8428-c83212d5bc0c /mnt/additional-disk ext4 default 0 0
Make sure that you replace the example UUID with the one that you found out using the blkid command.
You can verify the changes by running the following command:
mount -a
If the command does not return any output, the changes were successful. Now, when you restart your server, your additional volume is still mounted under /mnt/additional-disk.