Windows Usage Guide
This guide will show you how to use an additional volume with your Windows Server.
Prerequisites
This guide assumes that you already have a server and an additional volume in place and that you have Administrator access to your server. Please connect to your server using RDP or the VNC console.
Step 1: Open Disk Management Console
Open the Disk Management Console by searching for diskmgmt.msc in the Start Menu or in the Run dialog.
Step 2: Initialize Disk
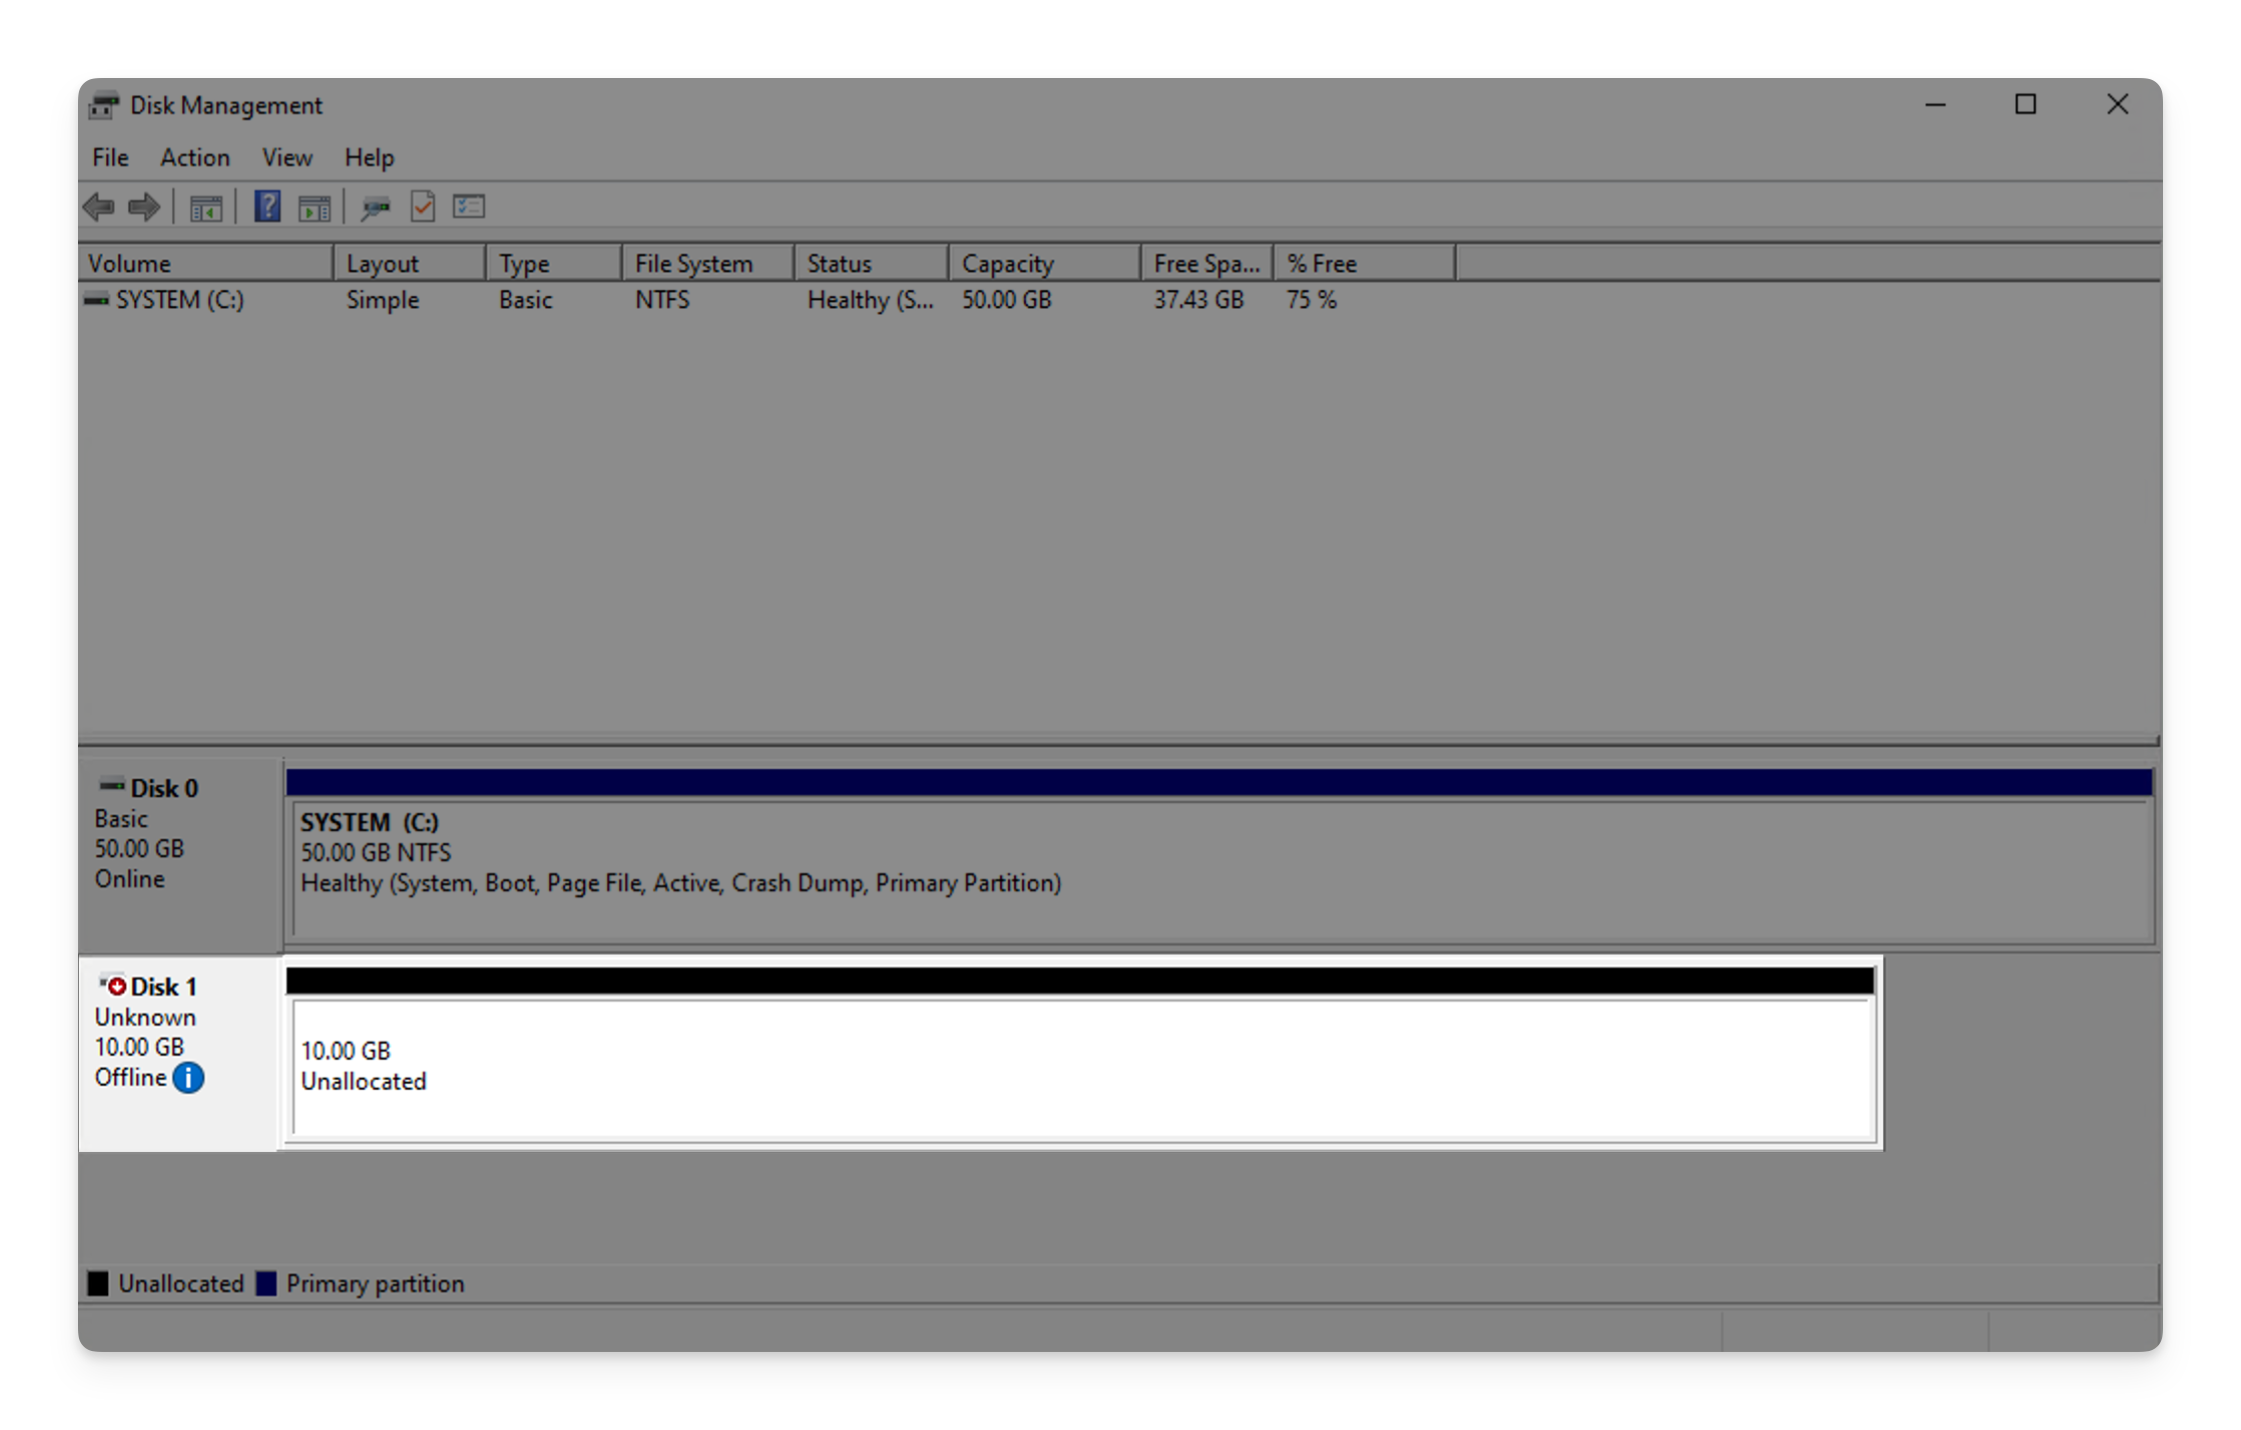
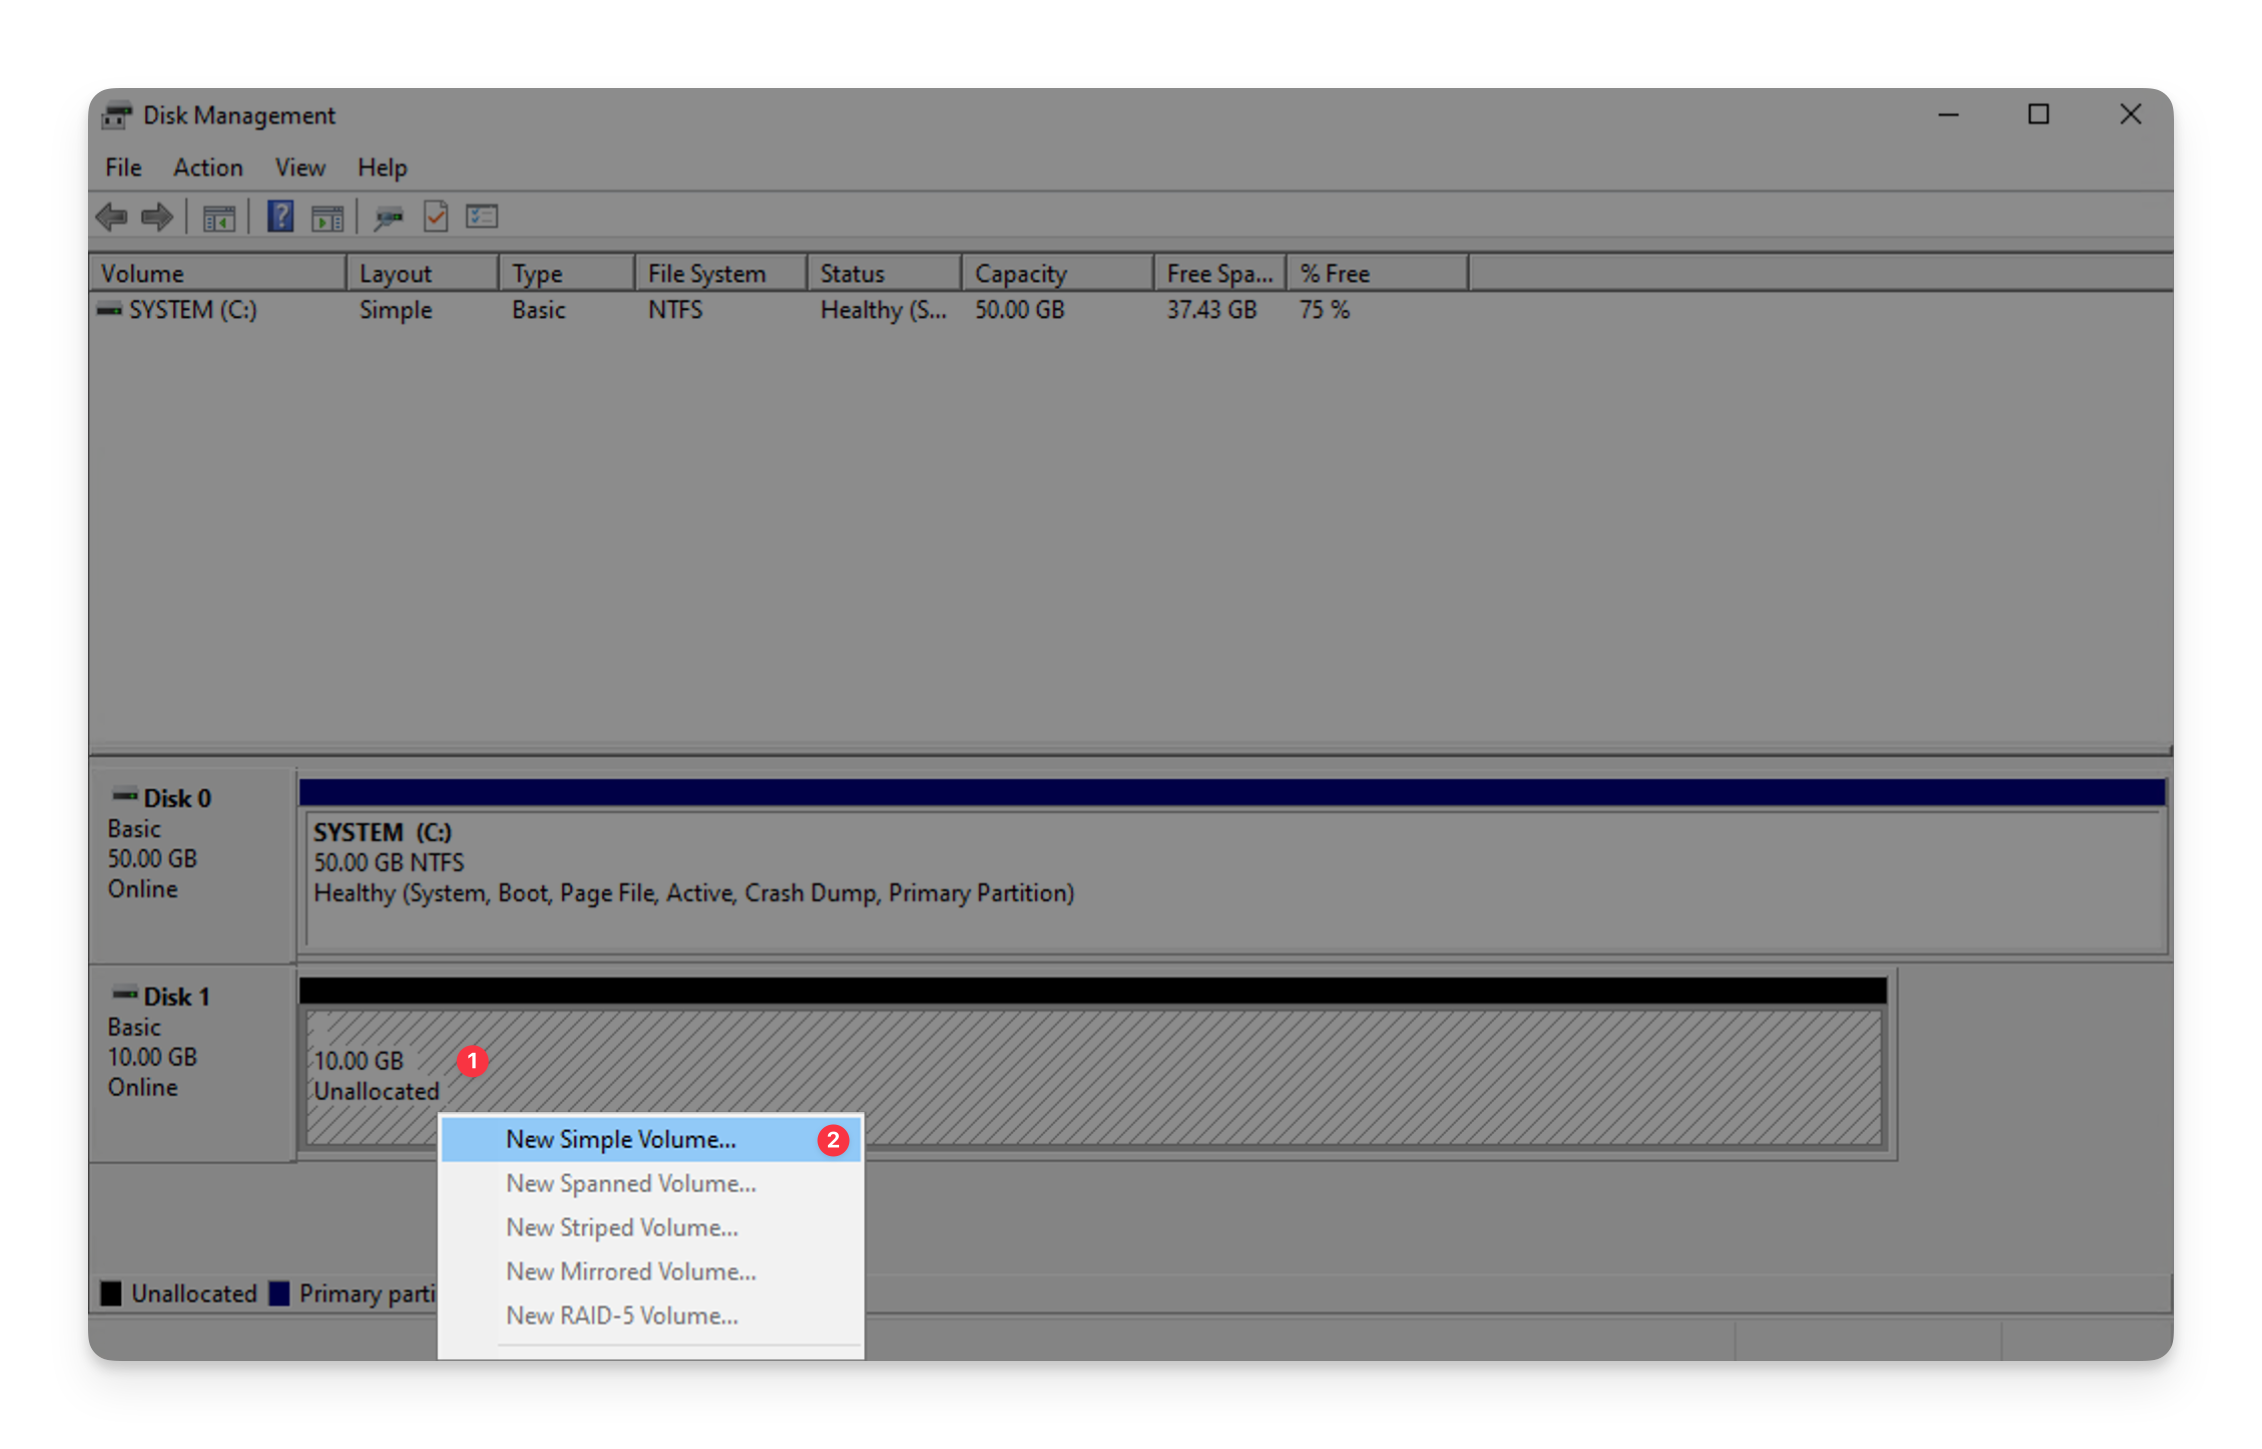
After opening the Disk Management Console, you can see your additional volume as offline and unallocated.
 First of all, you need to mark the volume as online.
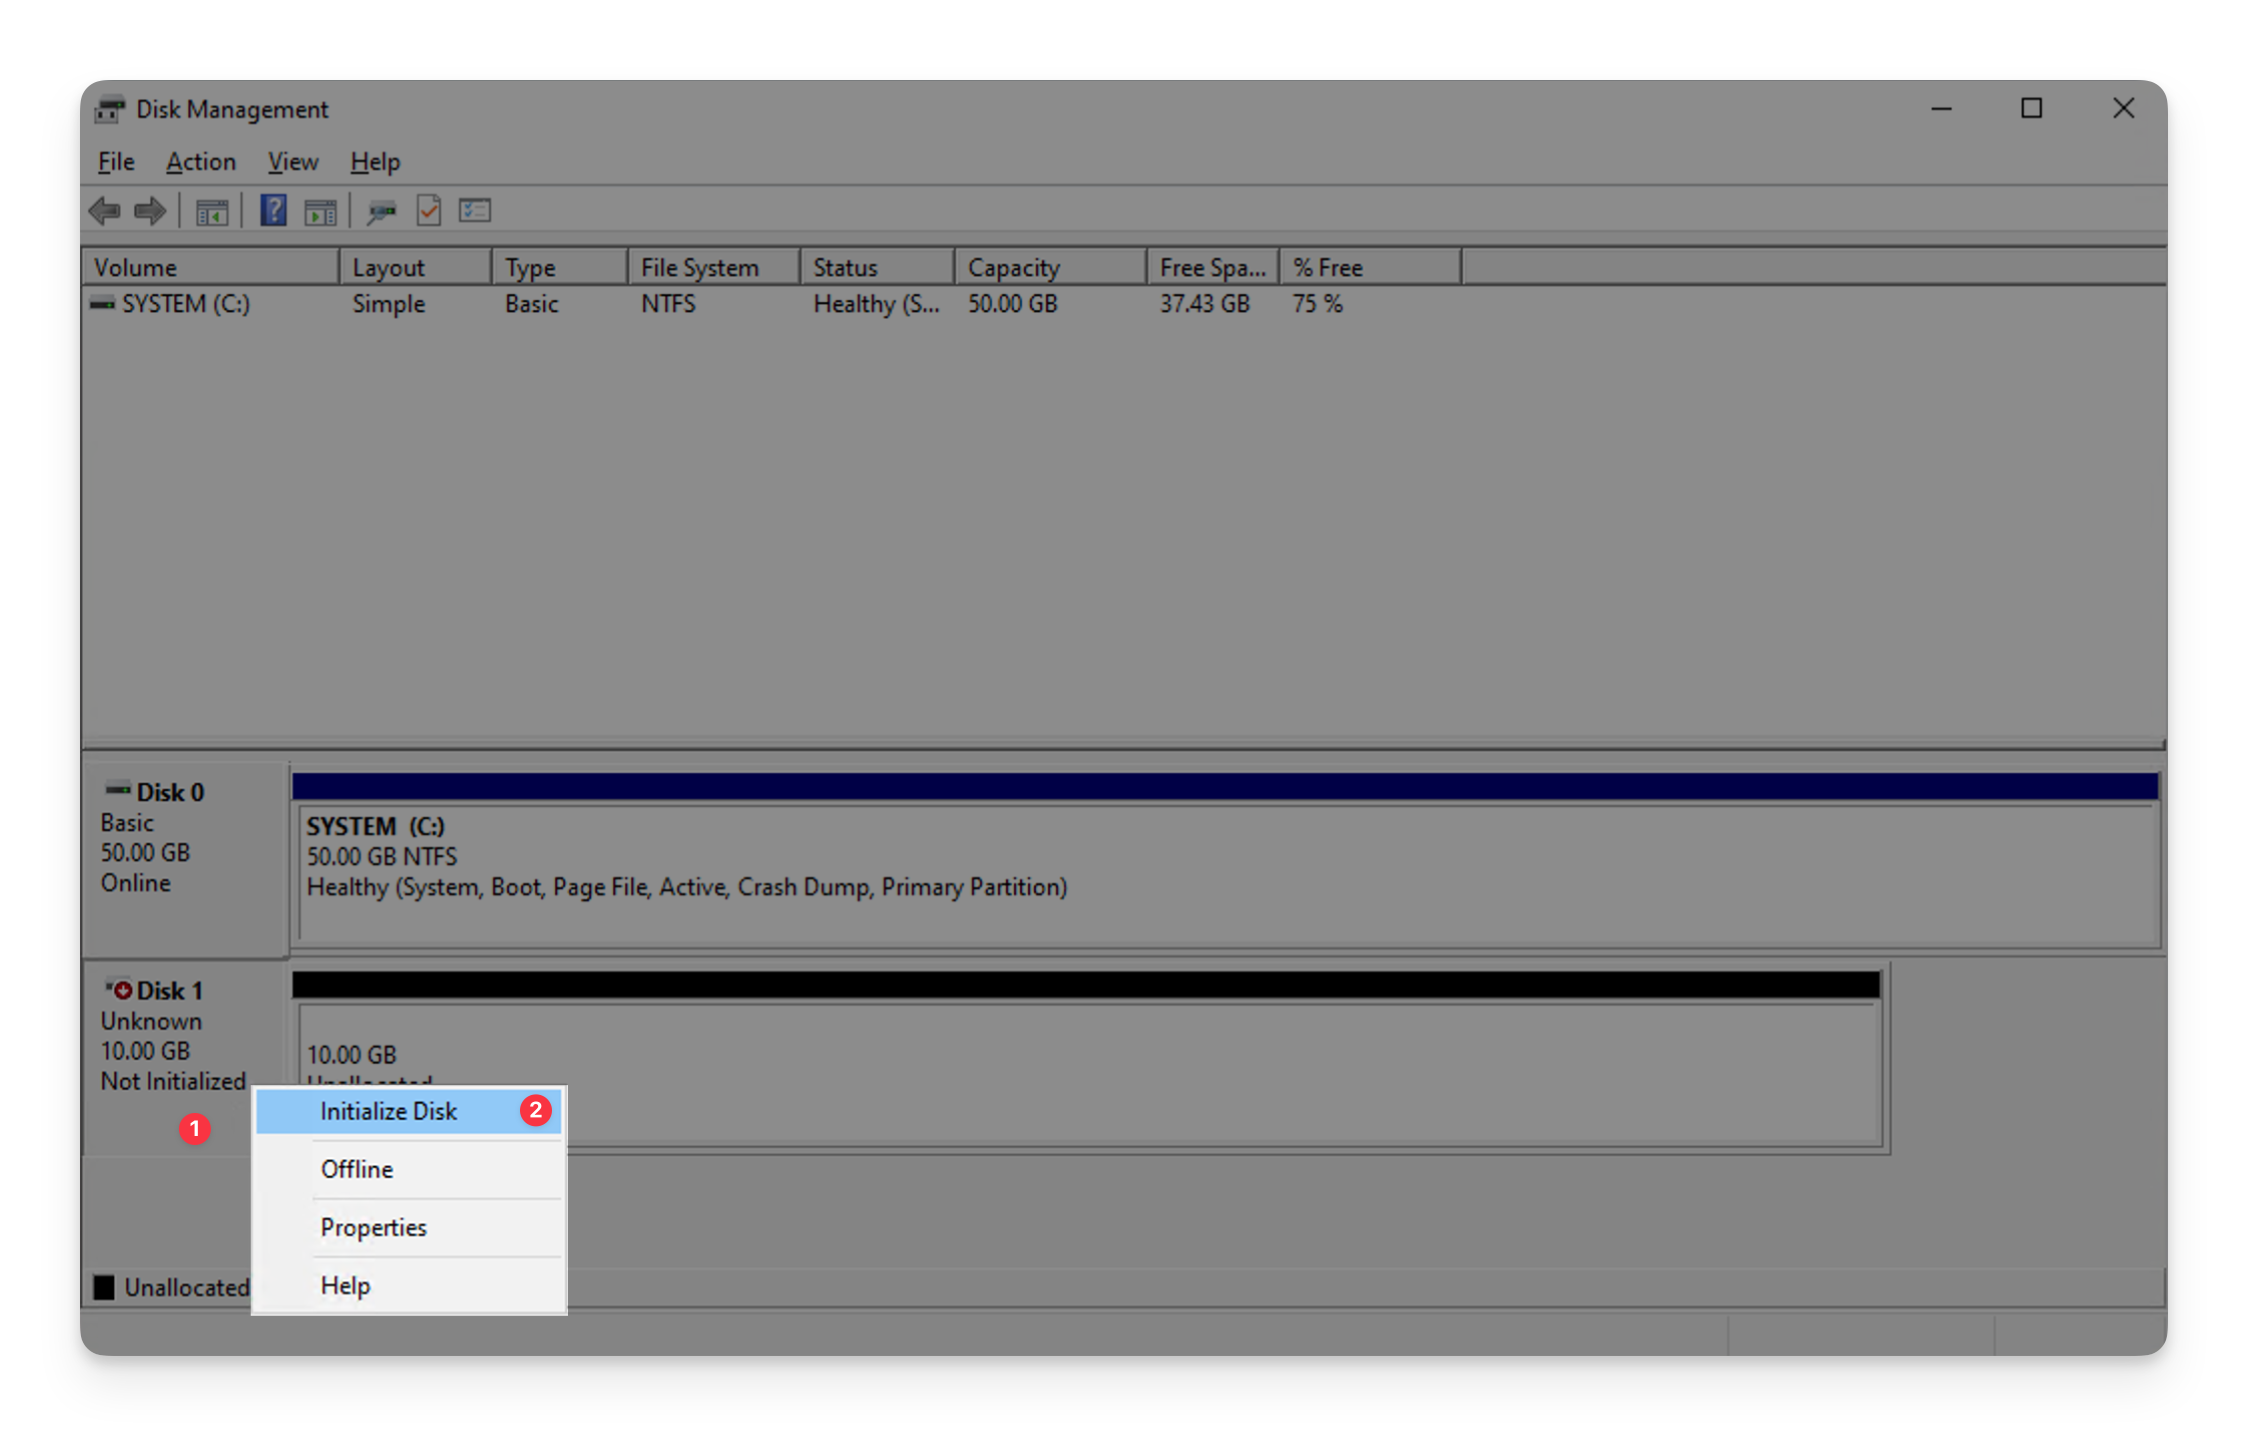
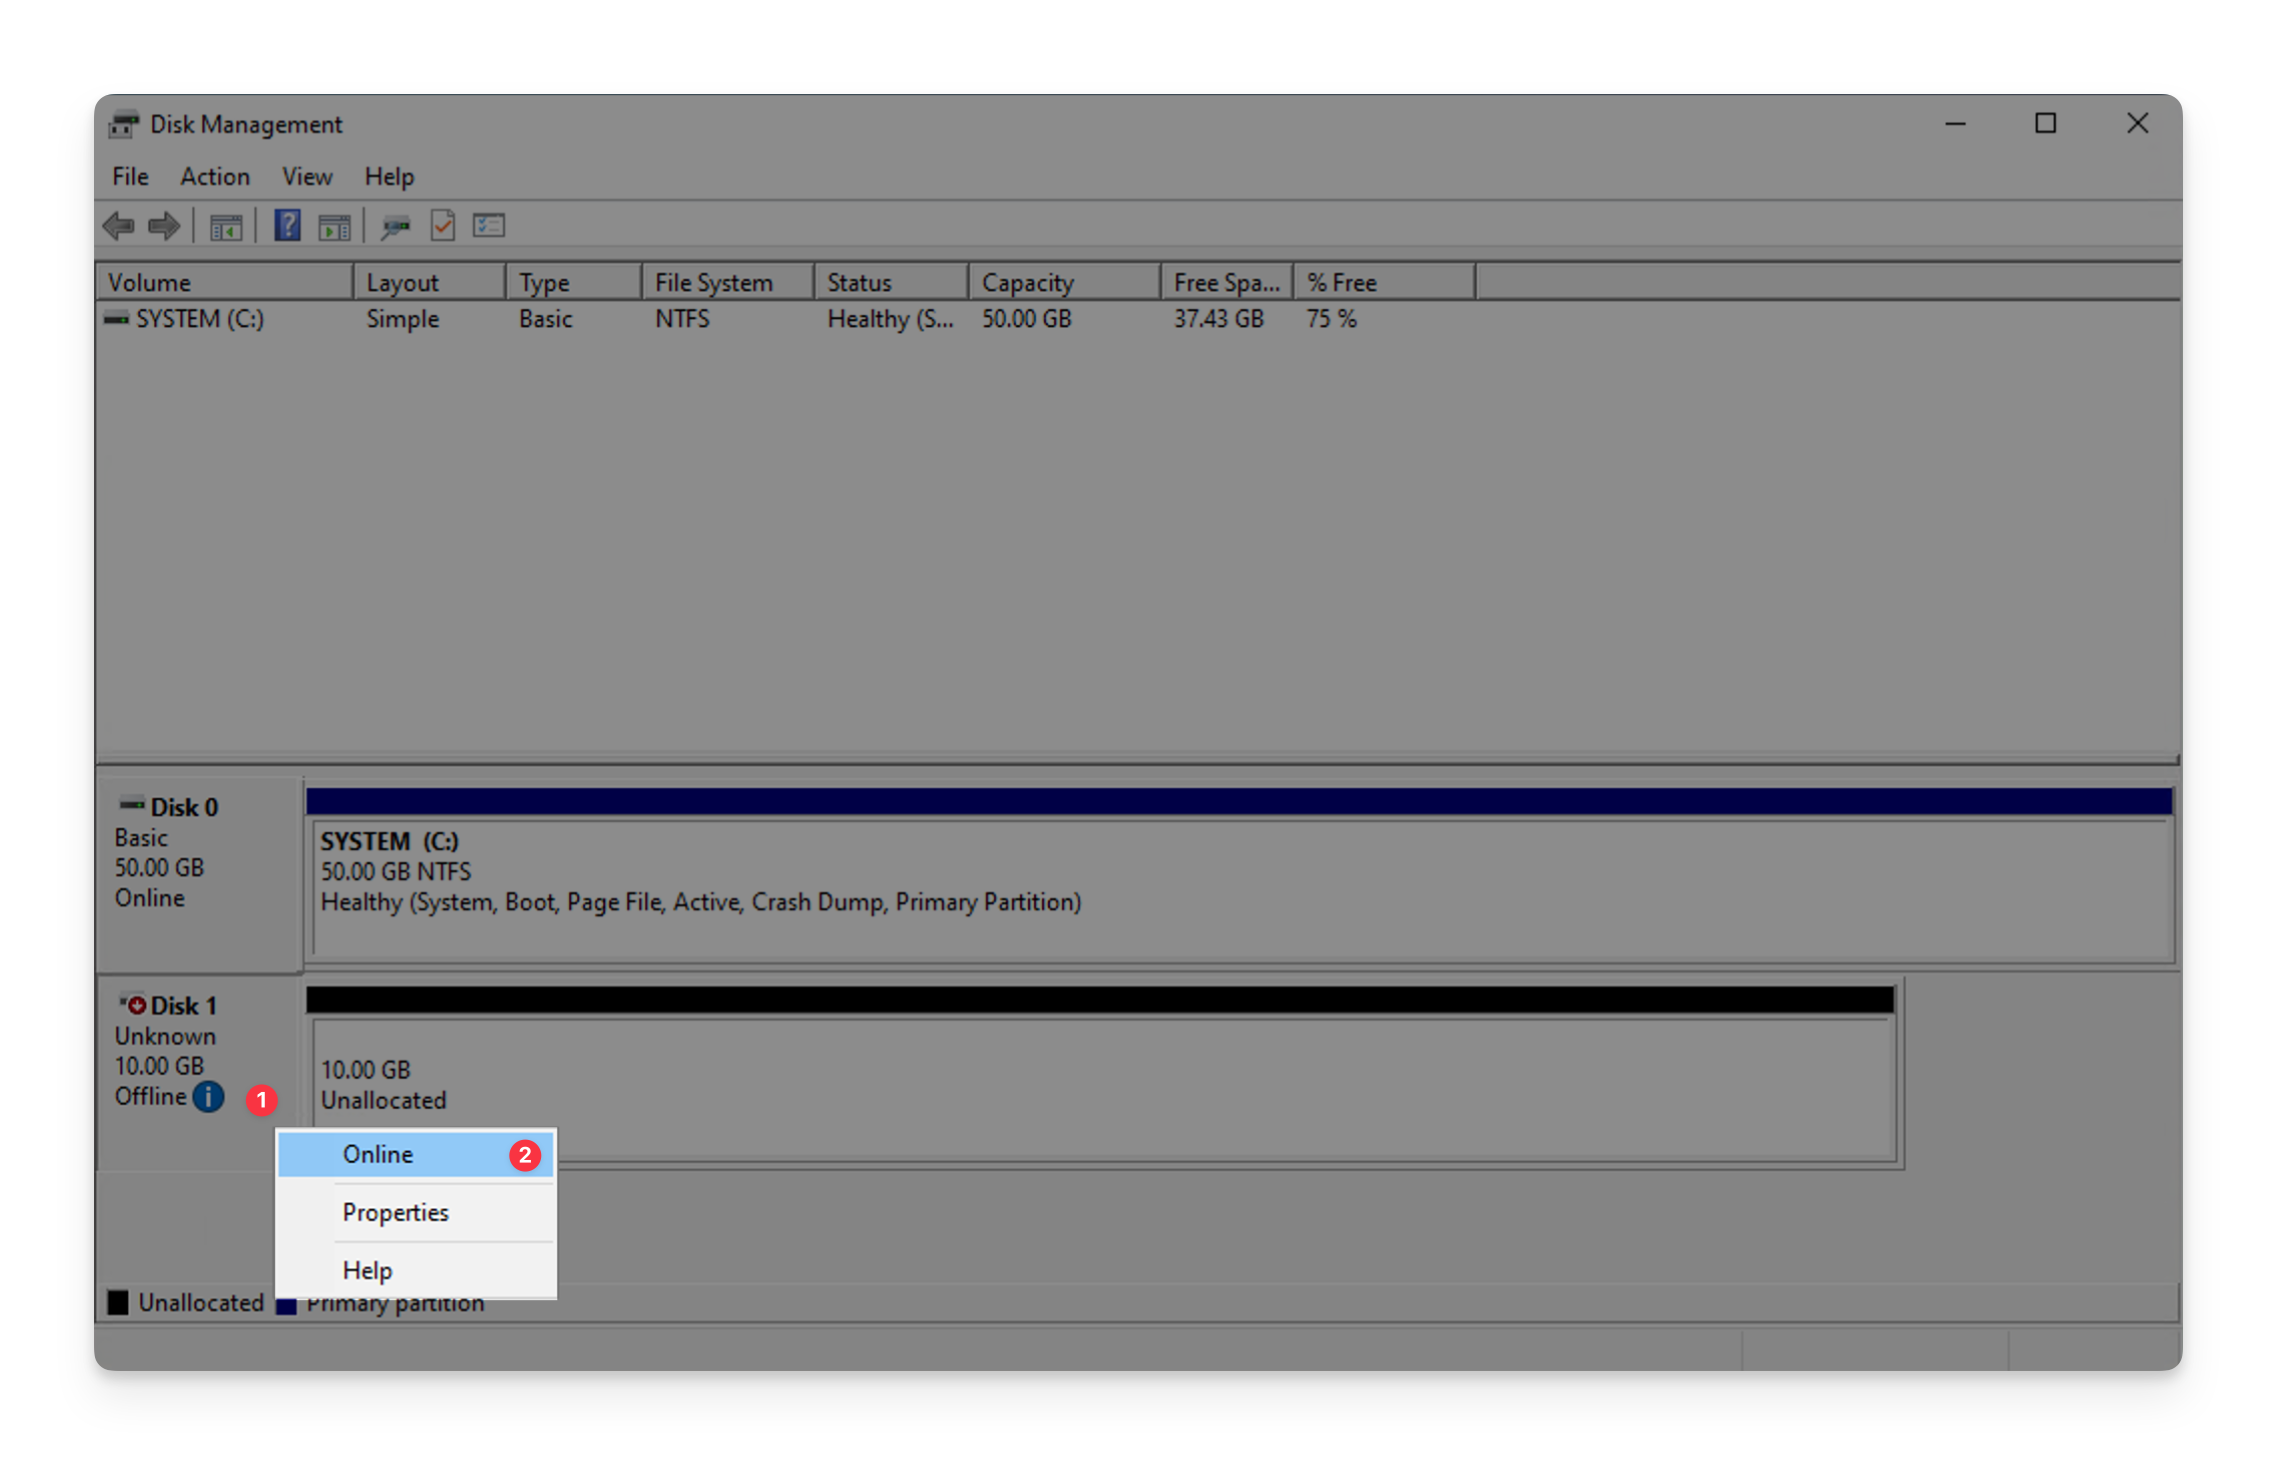 Right-click on the left part of the disk and select Online. Then, you can right-click on the left part of the disk again and select Initialize Disk.
 In the final dialog, you need to select the partition style of the disk.
 The partition type MBR is usually sufficient, unless you need to create partitions larger than 2 TB. In this case, you need to select GPT. Finish the initialization of the disk by clicking on OK.
Step 3: Create new volume
After initializing the disk, you can create a new volume on it. Right-click on the right part of the disk and select New Simple Volume.
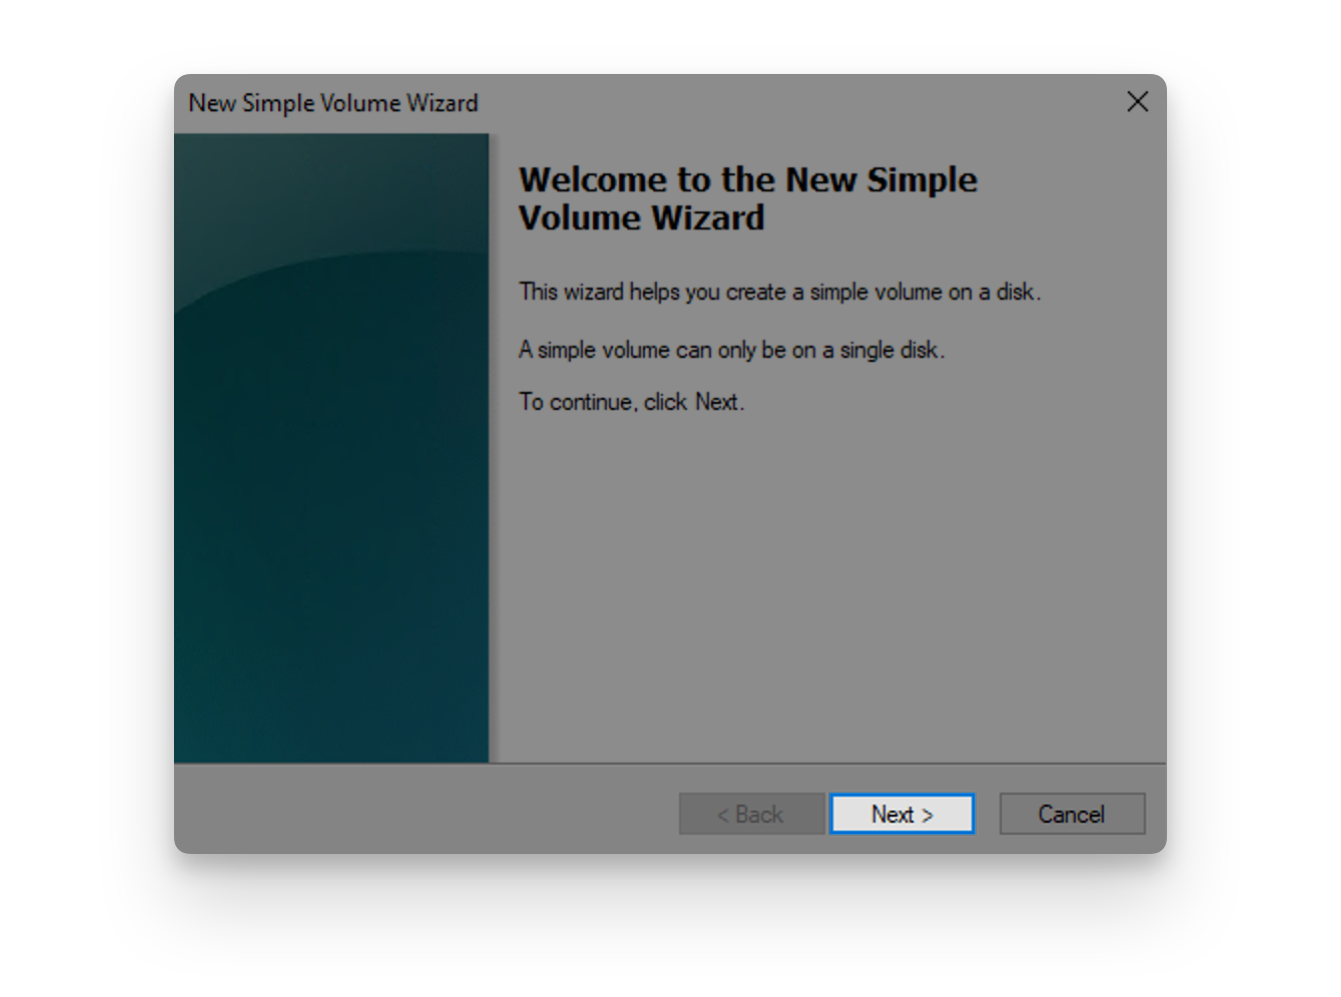
 This will open a new wizard. Click on Next to continue.
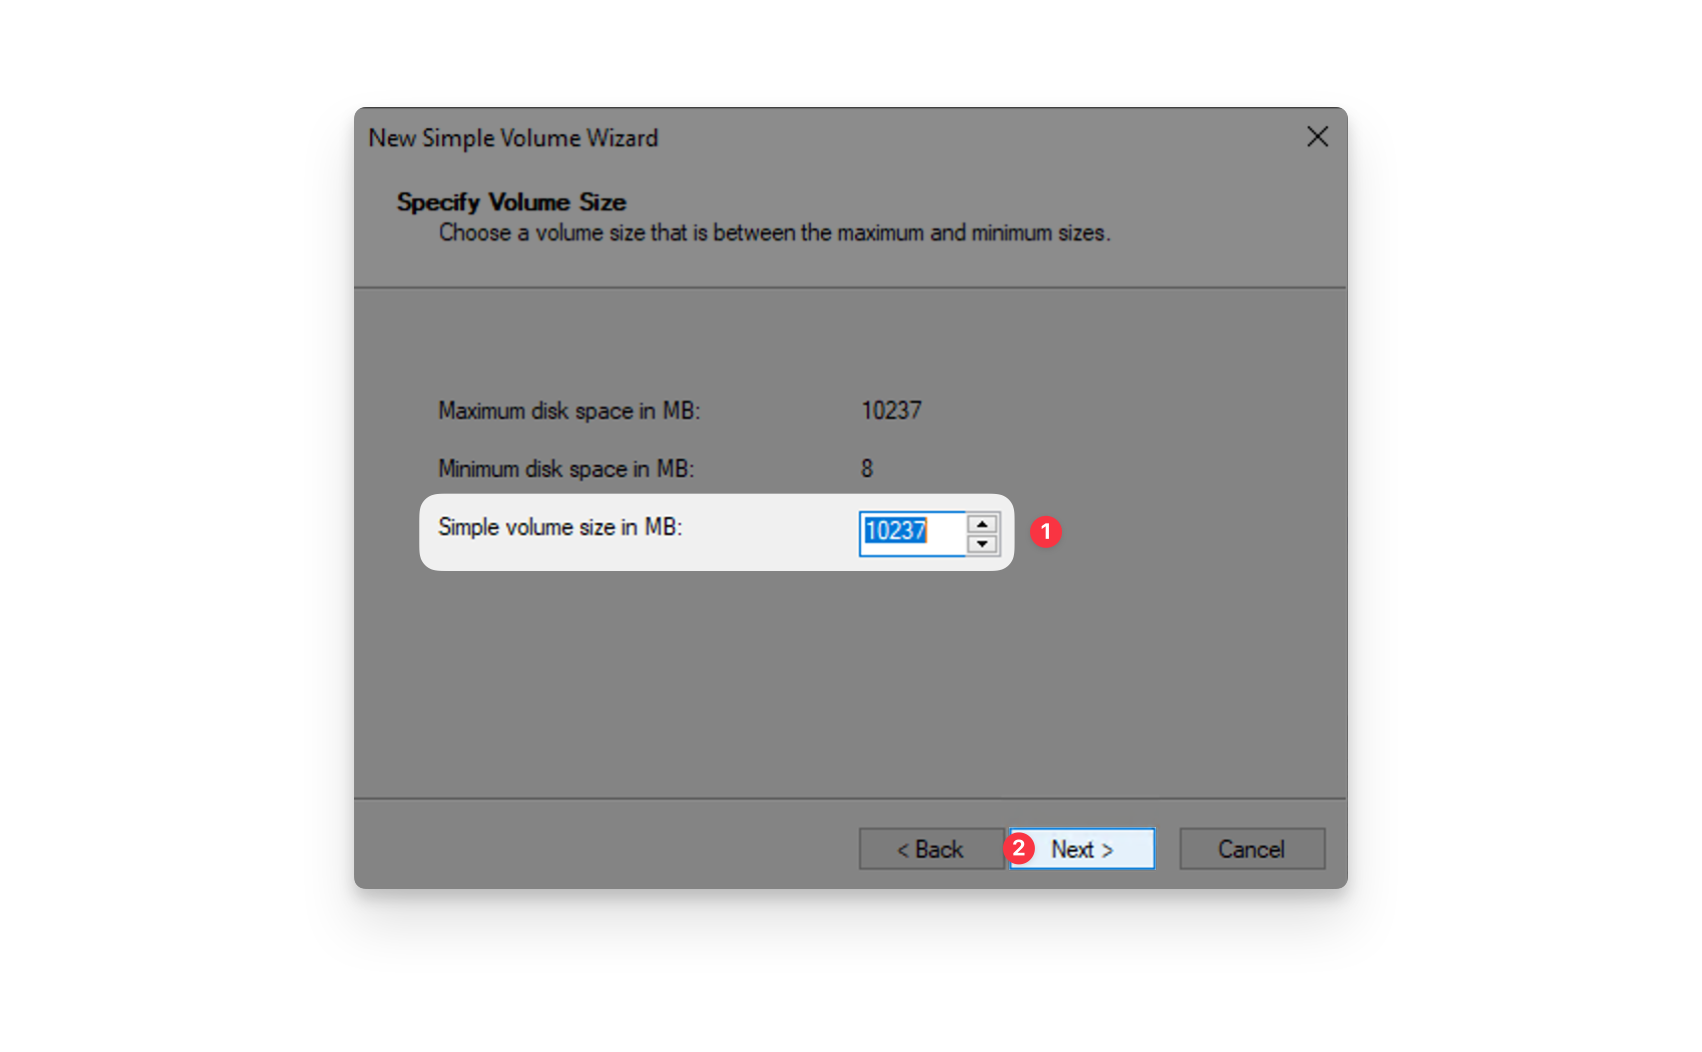
 In the next step, you can specify the size of the volume. Usually, you want to use the entire disk, so you can just click on Next.
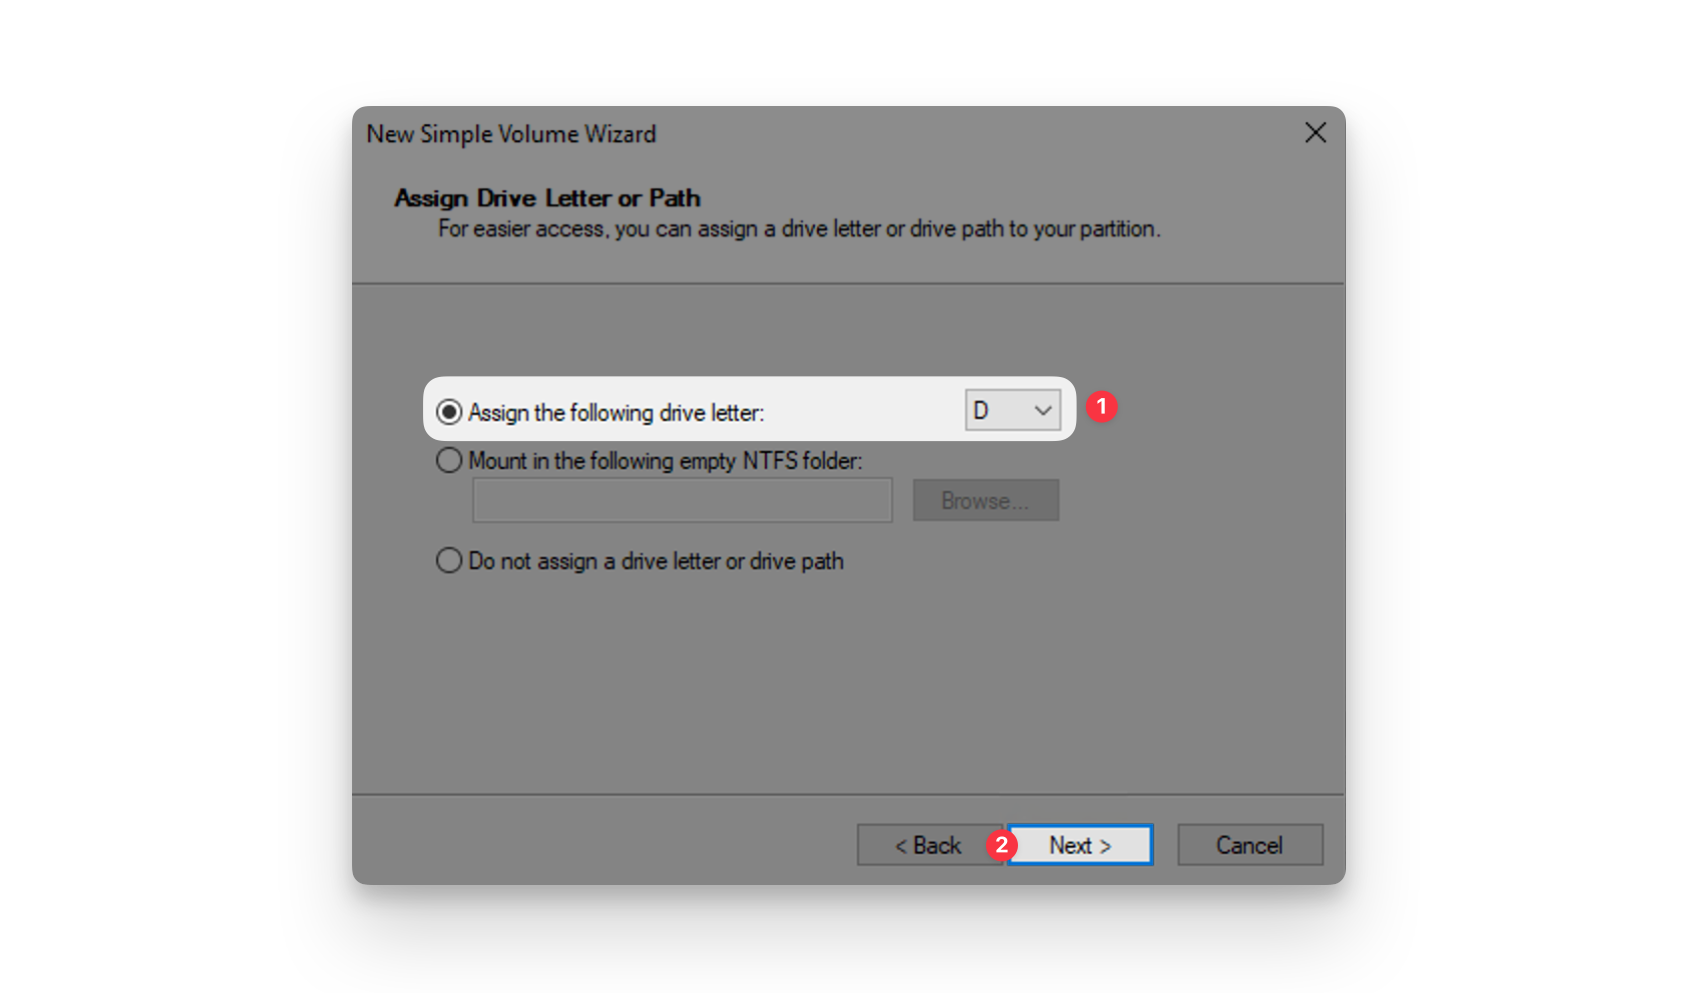
 Then, you can specify the drive letter under which the volume will be available. Windows will automatically select the next available drive letter, but you can also select a different one. Click on Next to continue.
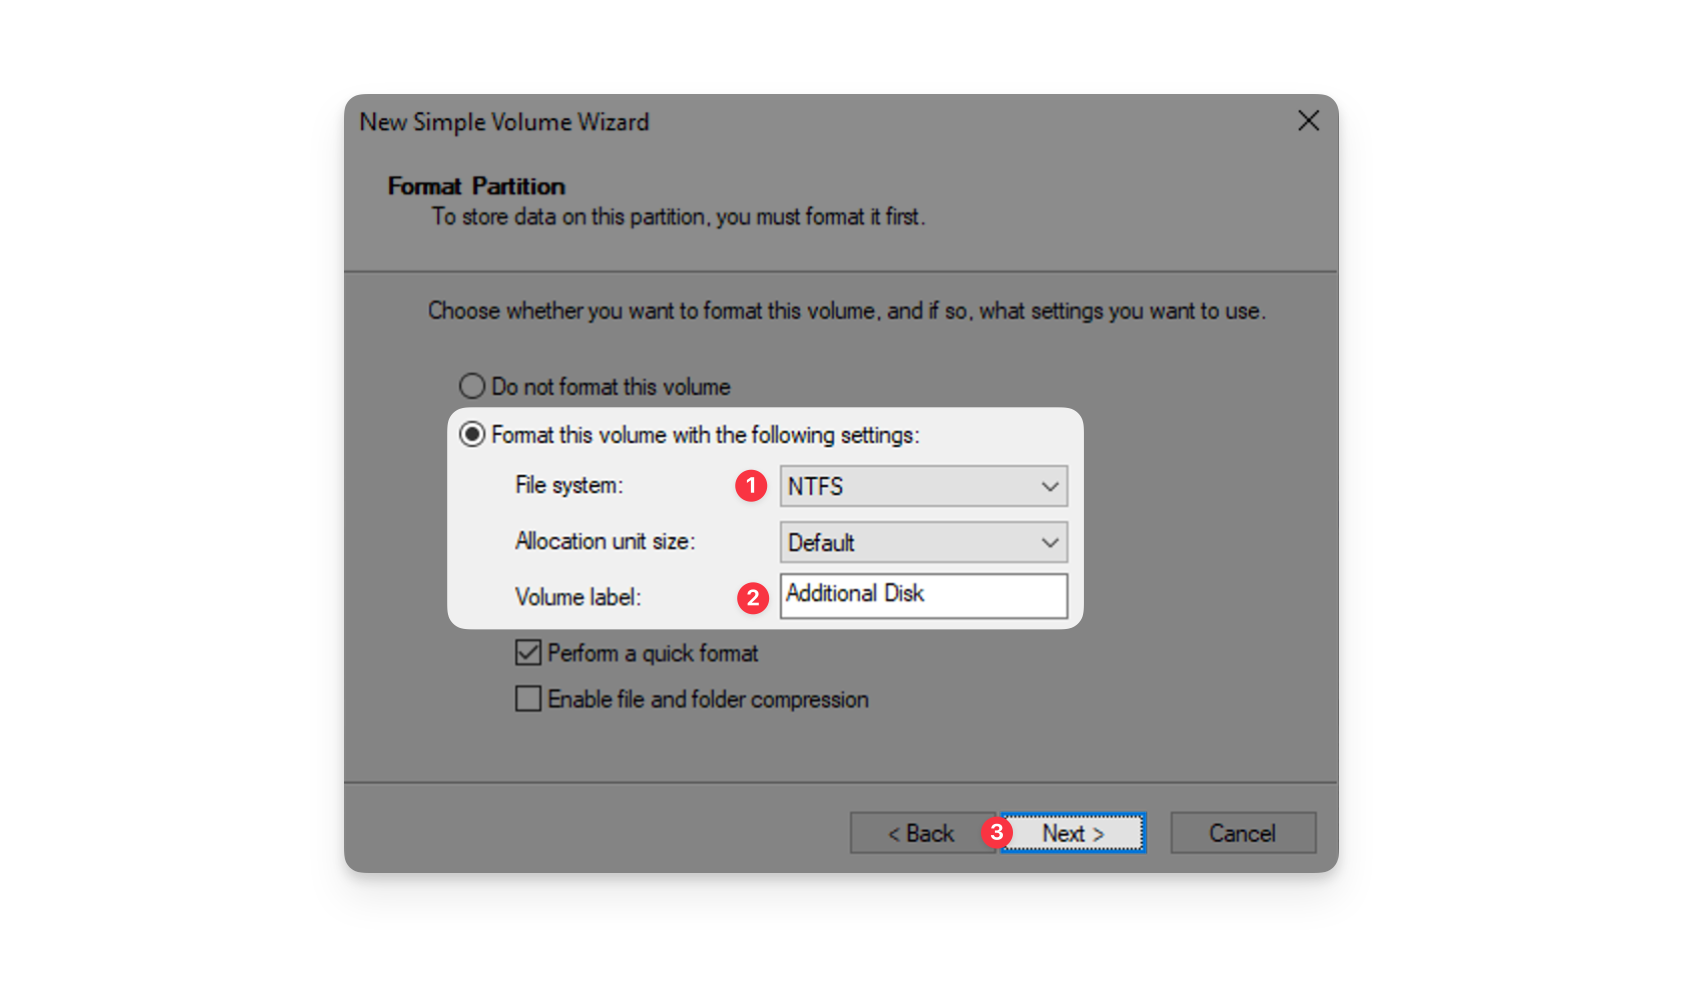
 Afterward, you can specify the file system and the allocation unit size. You can also specify a name to easier distinguish multiple additional volumes from each other. For the file system and the allocation units, you usually want to use the default values, so you can just click on Next.
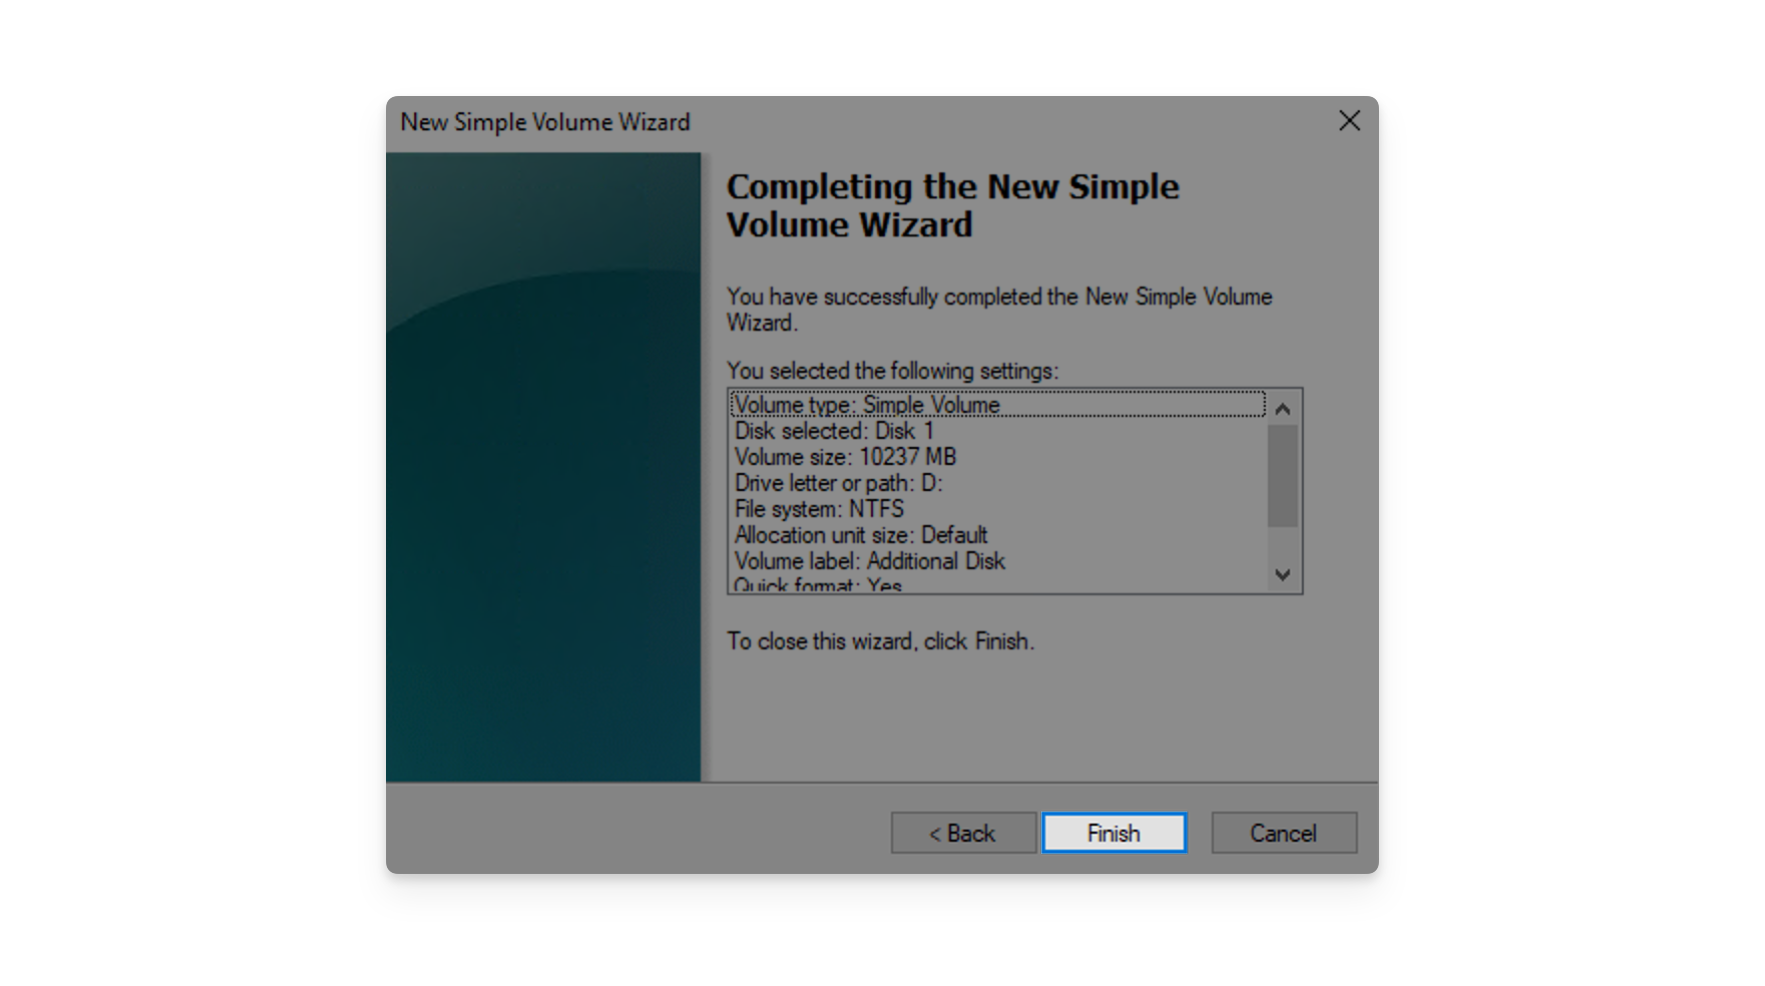
 Finish the creation of the new volume by clicking Finish.
Step 4: Verify
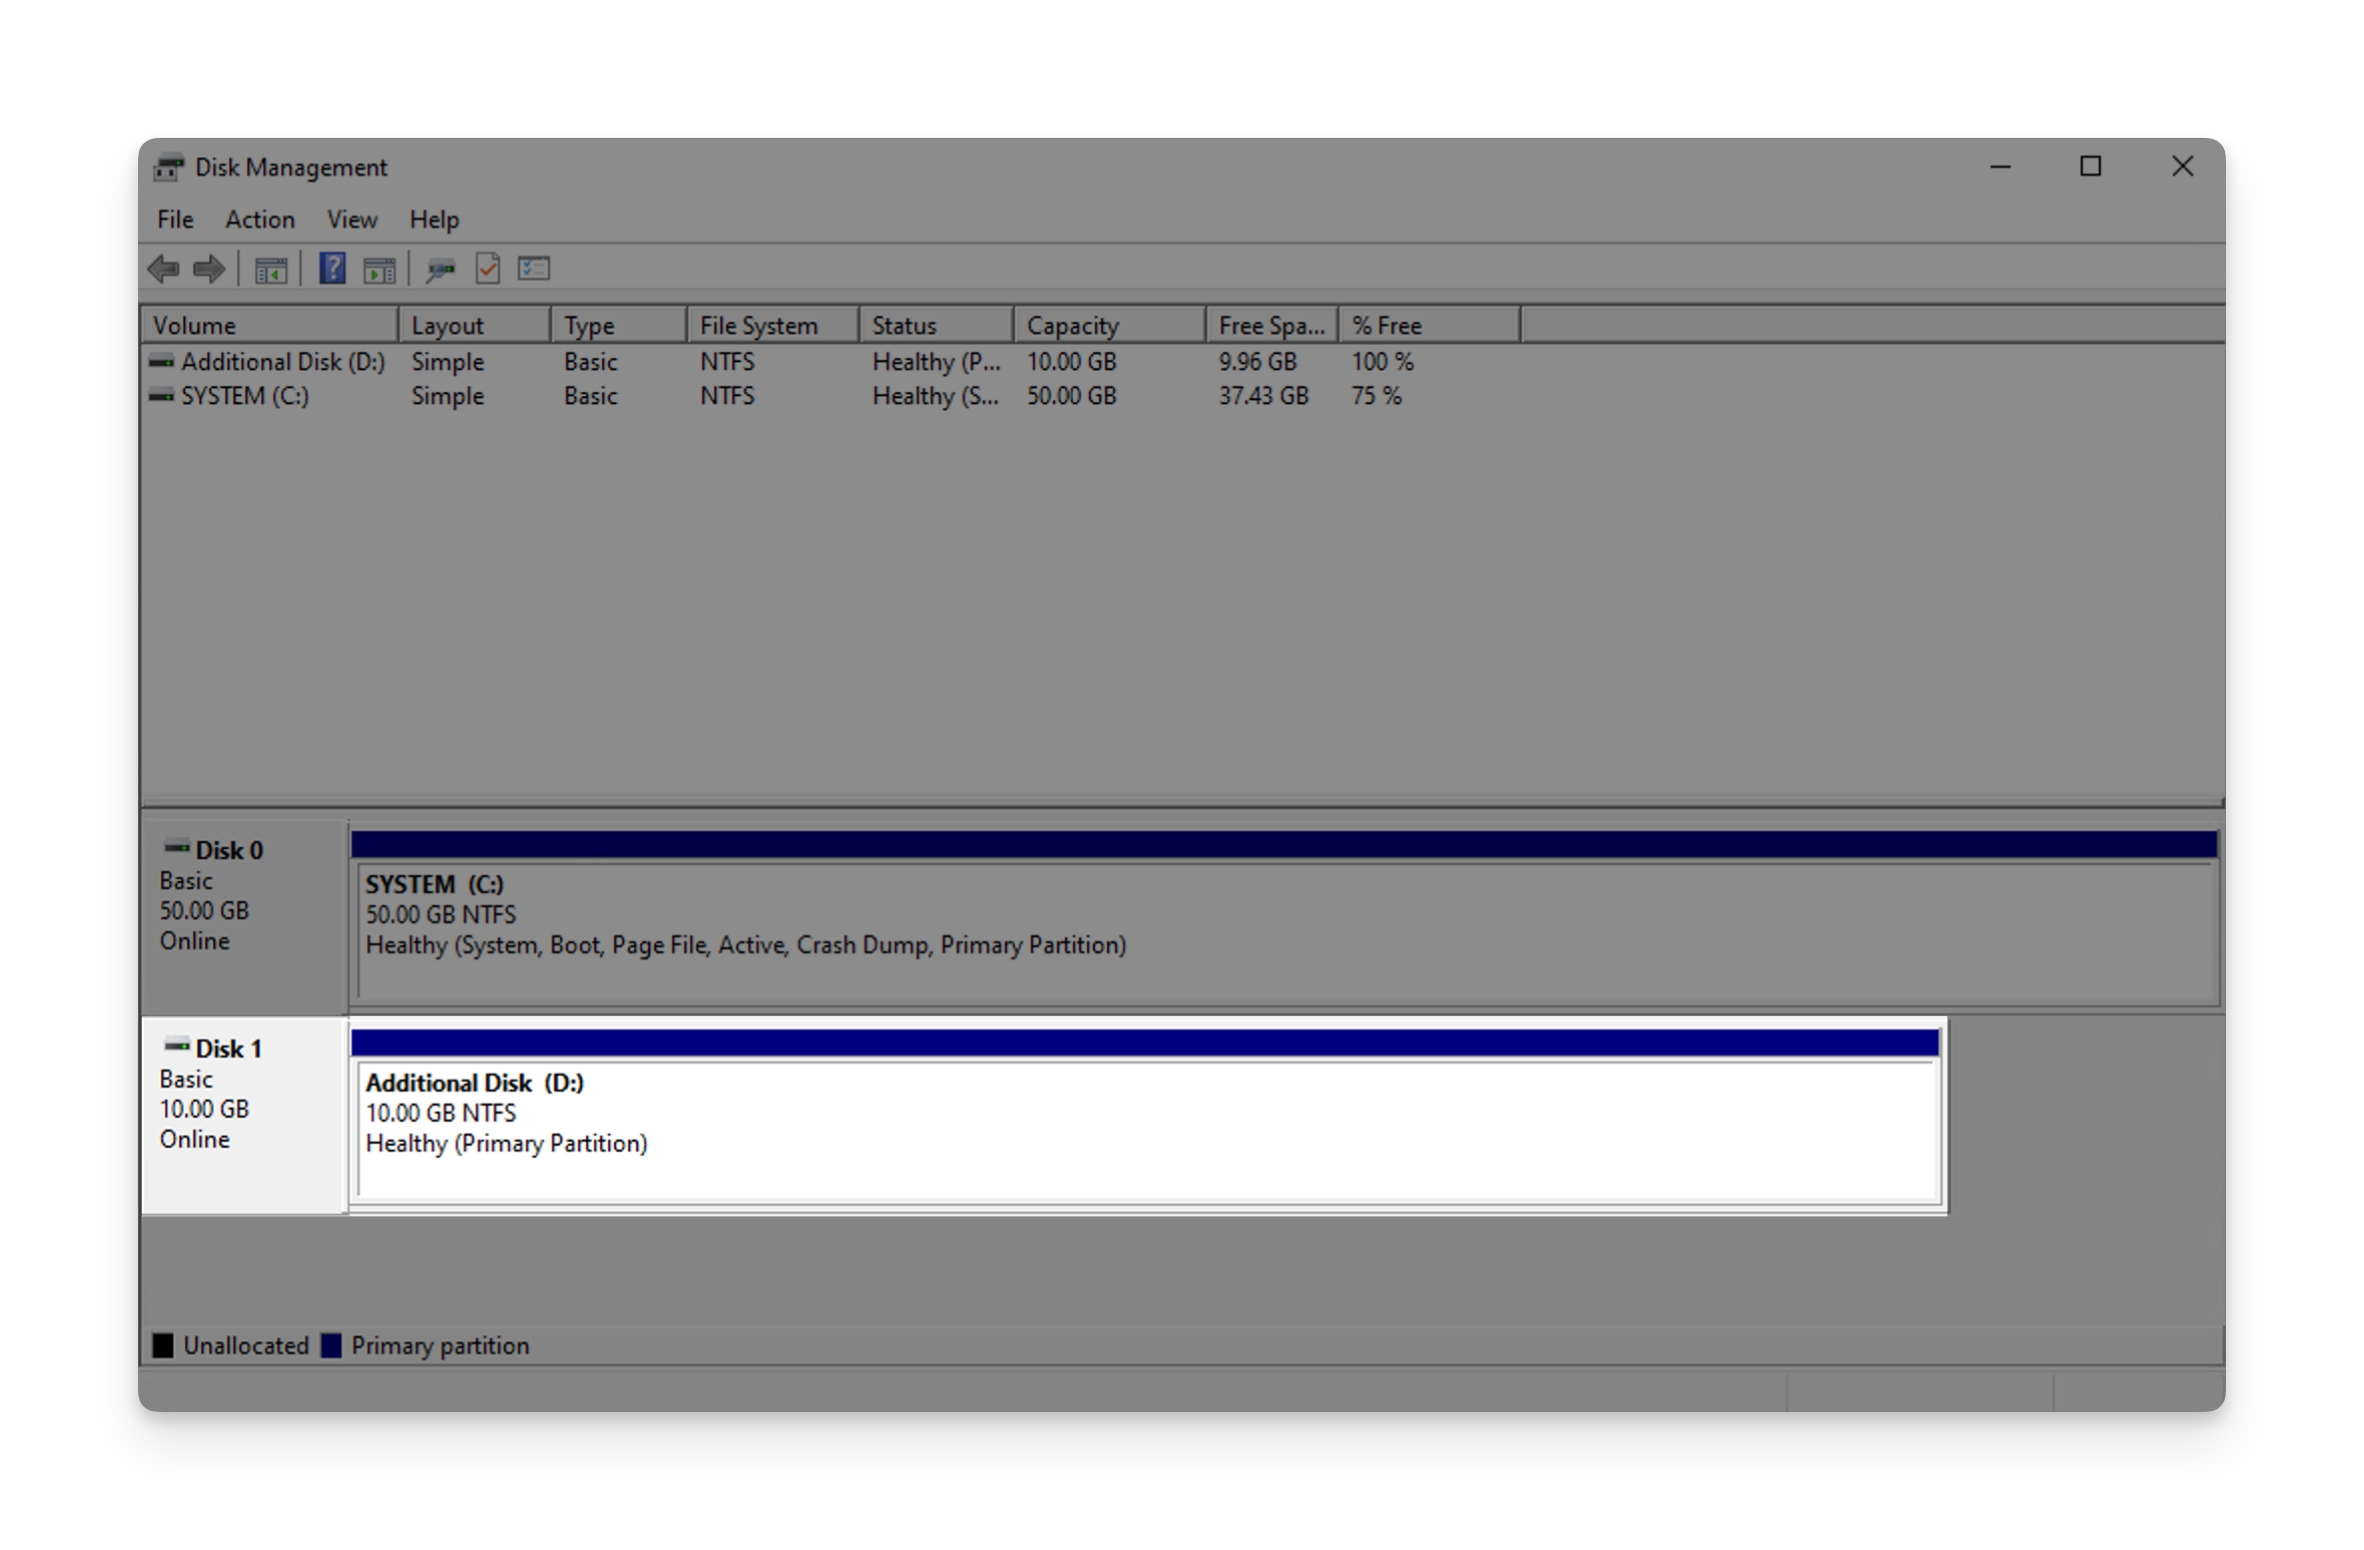
Immediately after creating the volume, you should be able to see it in the Disk Management Console. You can also see the drive letter you specified in the previous step.
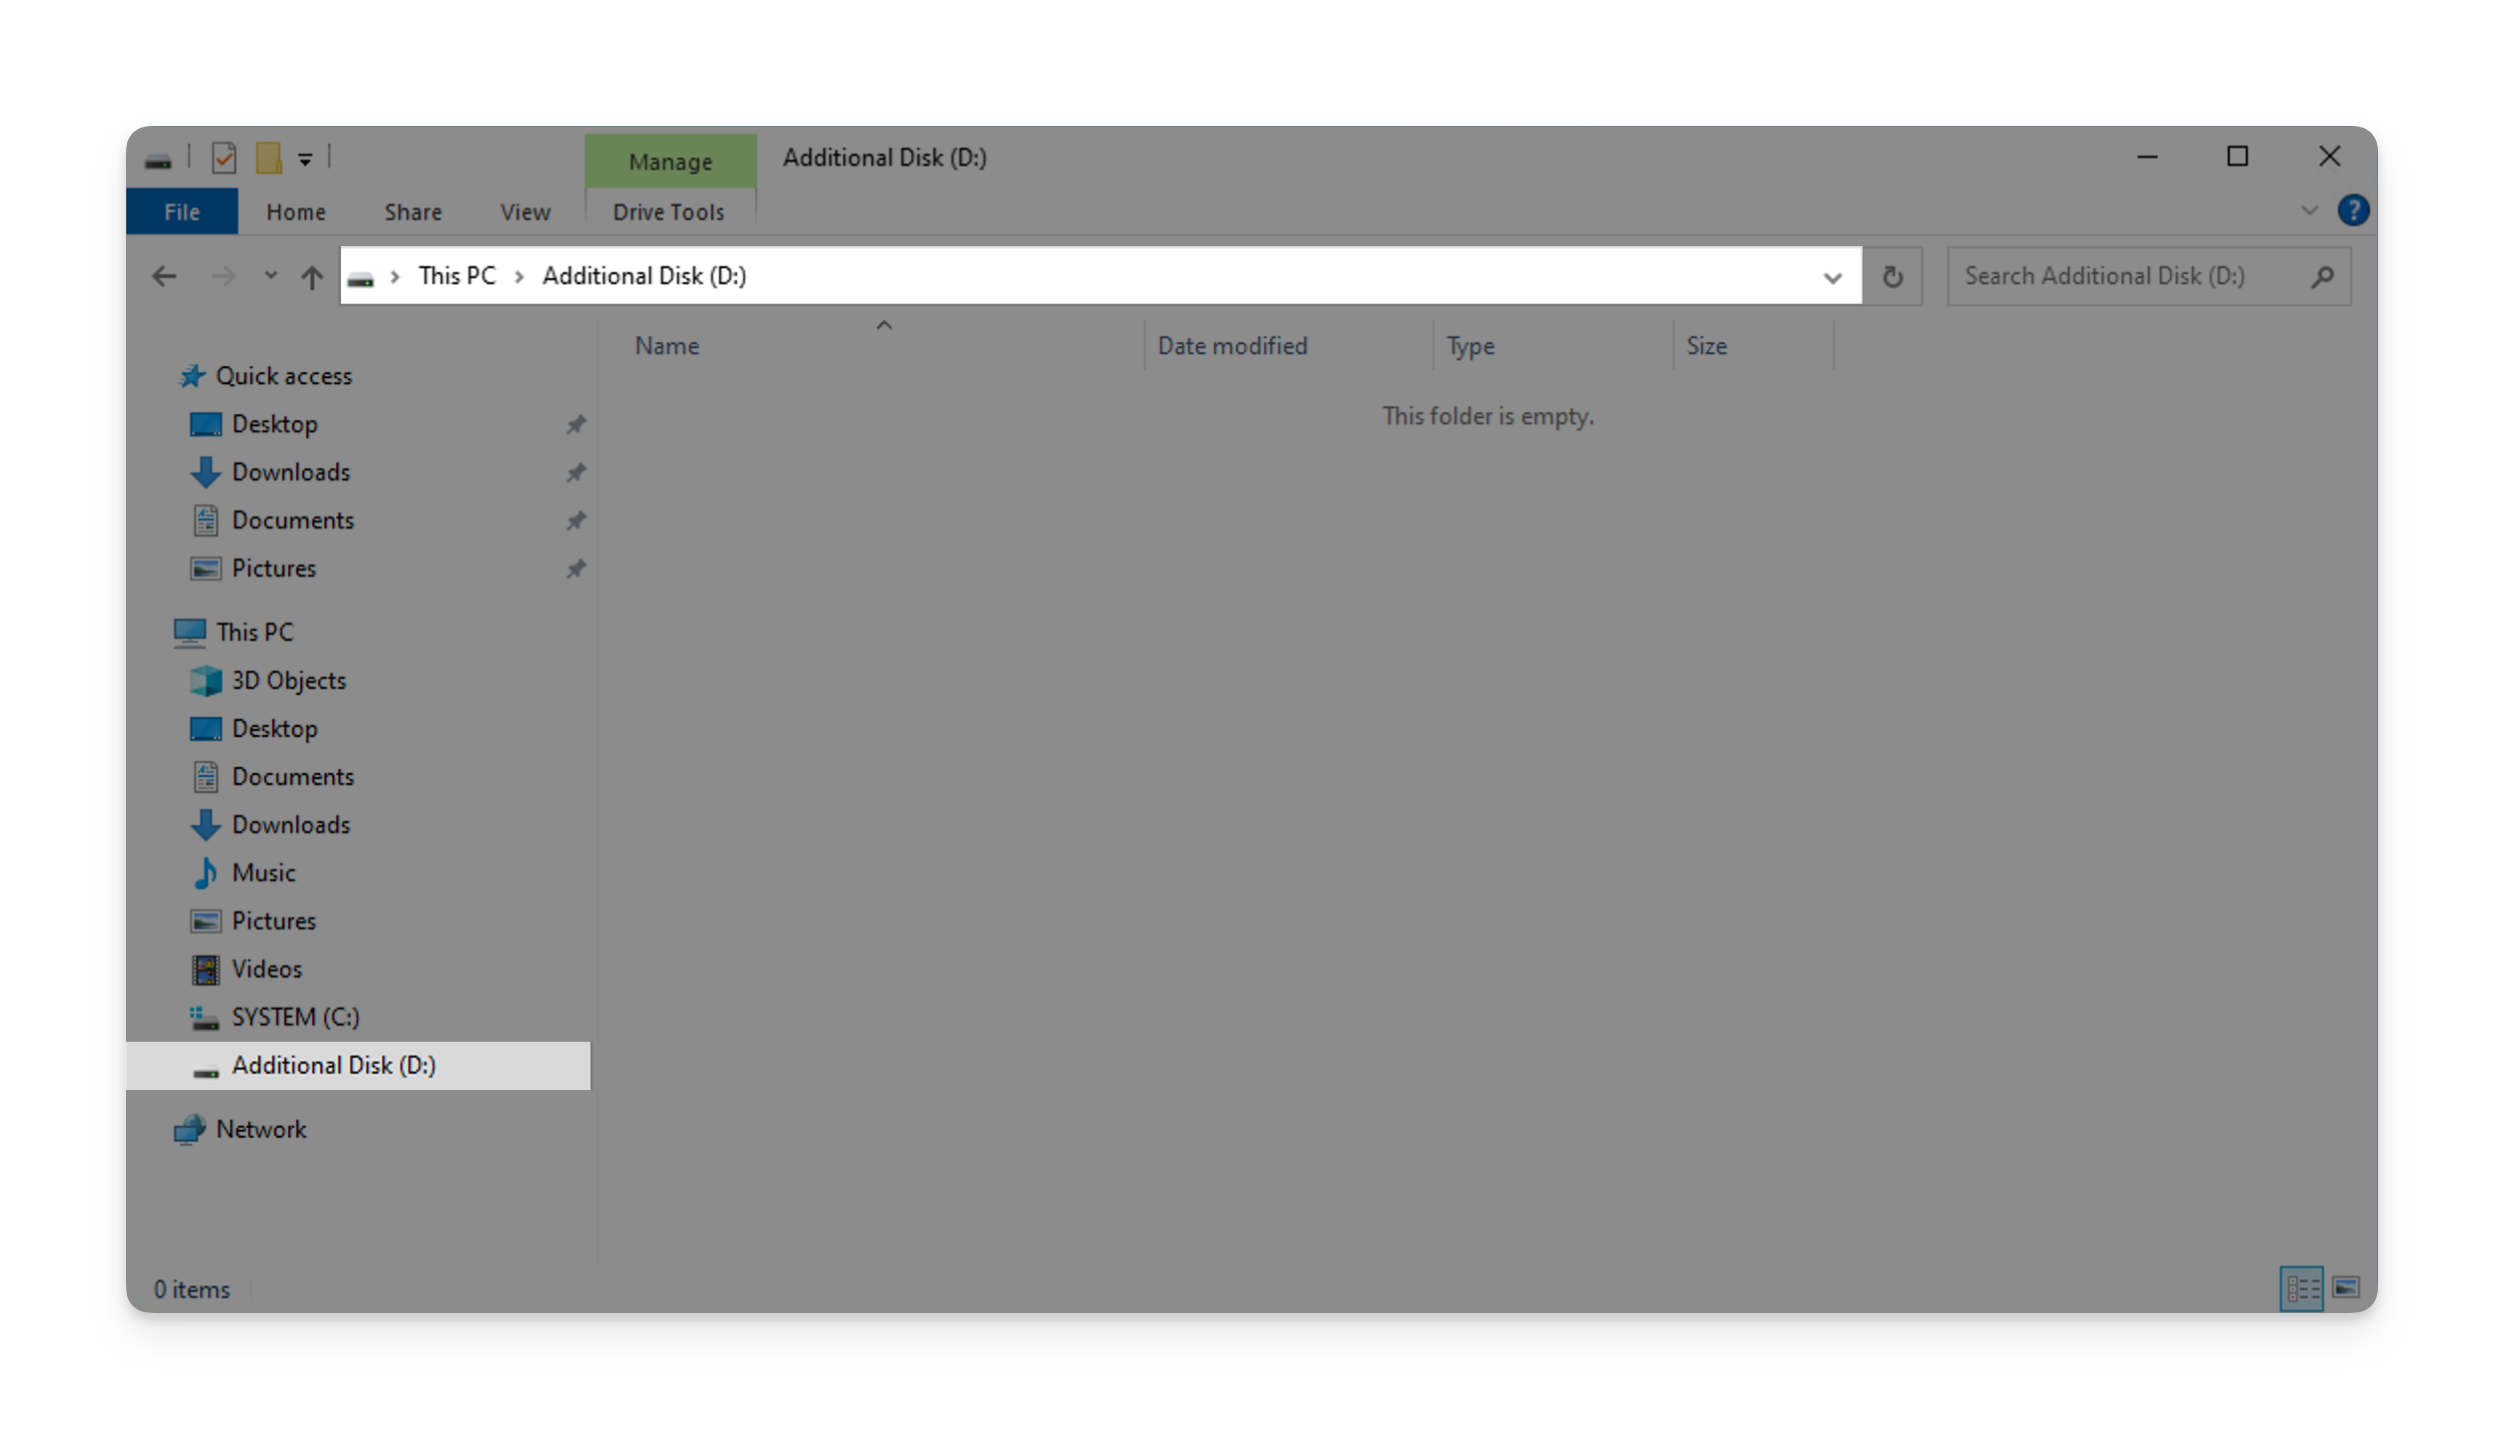
 Finally, you can go to your Windows Explorer to verify that the new additional volume is available and ready to use.